StumbleUpon Button

Showing posts with label easy cheesy. Show all posts

Wednesday, March 13, 2013

100% Real Fruit Roll-Ups

I confess, I have an addiction.  I have eliminated ingredients I can't pronounce from my diet as much as I can on a very tight budget.  I don't claim have the perfect diet, but I do what I can.  My addiction:  fruit roll-ups.  I'm not kidding you, I could sit down and eat a whole box at any given moment.  Do you know what are in fruit roll-ups?  ME NEITHER!  I am also trying to get more fruit and vegetables into my daily diet.  My one stone for these two birds?  100% real fruit roll-ups.

Are you excited?  You should be!  Here's the tutorial:

Step 1:  Start with fruit.  You can use any kind of fruit you want.  Berries, grapes, bananas, apples, seriously, go nuts.  I used blackberries and bananas, with a little grape juice squeezed in.  I should tell you, my measurements are not precise... I am a cooking snacker.  It's true.  So here's what I did, but keep in mind, it is almost impossible to mess this up.  So I used about 1 1/2 mason jars of blackberries and about 1 1/2 large bananas that were very ripe.  I used 1 1/2 because I ate the other half while I was peeling them!  Hahaha, I am really enjoying this post so far.  (Are my perfectionist readers angry yet?)  Put your fruit in a mediumish saucepan on the stove, low heat.  I also squeezed a handful of grapes' juice over the fruit.

Step 2:  Mash and mix.  As the fruit warms, get out your favorite masher and mash!

 Once you have everything thoroughly mashed together it will look something like this.  I am sure if you are more dedicated to hand-mashing than I am, you could mash to a smooth puree by hand.  I do not have that many hours in the day, so once I got it to a rough mash,  I whipped out the ol' hand mixer.  Keep in mind, the hand mixer is going to be messy.  VERY, EXTREMELY MESSY!  I don't know if I'm just terrible at being clean, but I had berry goo all over my hand, shirt, mixer, and stove top.  I am a messy cooker, but this was nuts.  sheesh!  I started at the lowest speed, went to medium for a while, then whipped it up to high for just a few seconds.  Again, these things are not an exact science, I was just winging it until my puree looked like this:

(Since I used Blackberries, mine are quite seedy.  I don't mind the seeds.  If you do, choose a less seedy berry, like blueberries, or other fruit.) 

Step 3:  Slap it on a pan!  Lay some parchment paper over a cookie sheet and spray it with non-stick spray. Do not skip this step.  Trust me.  It lifts off so easy when sprayed.  Use the back of a spoon or spatula to spread the mix evenly.  My pot of fruit made about 2 cups of puree, which was the perfect amount for my large cookie sheet.  Spread evenly, so as to avoid thin spots which will become crunchy rather than chewy and roll-up-y.

Step 4:  Pop it in the oven.  Set your oven to the lowest temperature.  I have the oldest, ugliest, crappiest electric oven on the PLANET.  My lowest temp setting is 200*, but there's also this ambiguous "warm" temp... I went somewhere between 200 and warm.  Between 150* and 175* is ideal.  Leave your oven open just a little.  Again, my oven is the worst, so it will only hold itself closed, halfway open, or completely open... ARGGGG!  ...so anyway, I stuck a wooden spoon in the door to keep it open just a crack.  You have to let some of the moisture out.  The cooking process will take about 5 hours... It can take more or less than that depending on what fruit you use.  You have to keep an eye on it starting at around 4 hours.  When you're done, the roll-ups will be a nice, dark color.  Poke it as you go.  It should feel slightly squishy but not sticky when it's done.  
If it stops feeling squishy, and is crunchy, you've gone too far or spread too thin.  I'm not 100* sure, but I bet if you squeezed some fresh juice over it (think grape or apple) and let it set (covered) for a while, you could probably moisten it back up some.

I am not perfect, so I always have a few crunchy spots.  I tear them apart from the nice chewy bits and put them in a baggy to crumble over oatmeal or yogurt later.

When your roll-ups are finished cooking, pull the parchment paper to a cutting mat and use a pizza roller to slice into rolls.  All that's left is to roll 'em up and enjoy!  I would love to hear about the fruit combos you choose to try!
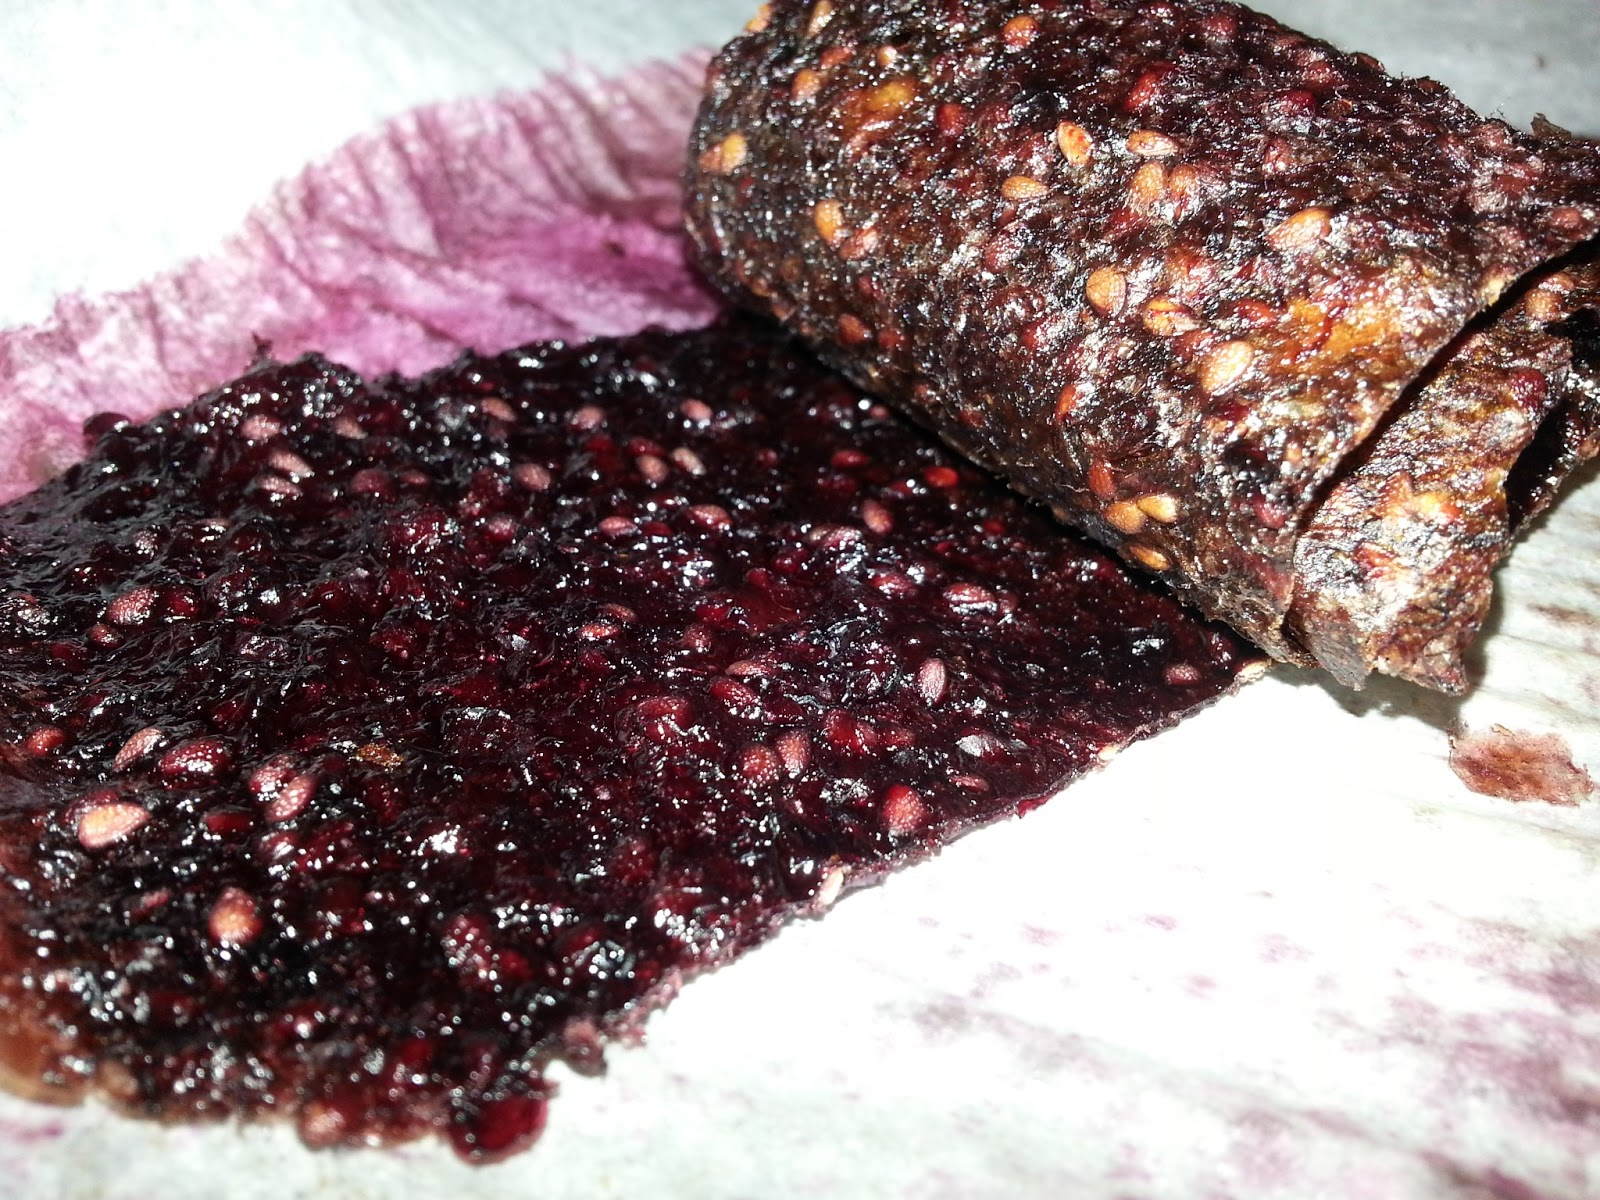

So, what do you think?  The pictures were a little better, huh?  In other news, I GOT ENGAGED THIS WEEKEND!!!!  I'm so happy, and since my wedding will (obviously) be almost completely hand-made DIY projects, you can expect plenty of pretty new projects coming your way.  I am one happy gal!

[Linked up at:  , Under $100 Linky Party ]

Wednesday, March 6, 2013

Don't call it a comeback ... or do.

Well, well, well... What do we have here?  A mighty neglected blog, I would say.  You've been weighing on my heart recently, blogfans, and I am here to officially announce that I'm back in action.  It has been over a year since my last post, and I just can't believe it.  I've got some big announcements coming up and plenty of blog ideas / projects that I've piled up while I didn't have time to actually sit and write the posts.

Disclaimer:  This next chunk of yada yada yada is going to be aaaaaall about my life for the last year.  For the shoe tutorial, scroll down a little bit.

Last winter, things got a little overwhelming trying to balance work, blogging, and being a full-time biology major.  There was no time for blogging at the end of Spring term, because it was off to camp I went.  I spent my 20th summer at camp as an admin at a super amazing Girl Scouts camp, and I'm going to another one this summer!  Yay! After camp last summer, I moved to southern Oregon with the fella (we'll call him "Mainah", since he is indeed from Maine and sometimes gets a really cute New England accent... especially when he says "wicked" instead of "really"). We live in the smallest apartment outside of Manhattan.  Okay, it's not that small, but it requires imaginative, functional decorating.  People say to us all the time, "There are only two of you!  How much room do you really need?"  That question does not earn a response from me.  I have a craft closet of sorts that is overrun with camping equipment.  I finally found my desk/worktable surface under the avalanche of who-knows-what that was piled on it for far too long.  We are fairly settled right now, and since I'm headed back to camp in 3 months, there's no better time to get this show on the road.  I have missed blogging almost every single day since my last post.  I am not going to promise daily posts, but I will make some commitments to myself and my blog:

  1. I will post at LEAST once a week, by Saturday night.  Rain or shine, there's going to be some magic.
  2. I will practice my "blogtography" skills. I am by no means a photog and it shows... I'll try to make my pics as pain-free to look at as possible.  
  3. I will remember that this blog is a creative outlet and journal of sorts.  Not pressure, no stress, just fun.
On to the good stuff...  I would love to share with you some of my favorite projects from the past year! 

Dip-dyed Shoes
I should start by telling you that as a "camp person"  I have worn an unreasonable amount of tie-dye in my life.  Do you remember that weird period in the late 90's when tie-dye wasn't cool and it made you look like a throwback 70's weirdo?  Yeah... I was that kid.  Flash forward to the 2000's and it came back!  It's starting to fade a bit in popularity again (to my dismay), but there is a sweet newish trend --Ombre-- that everyone is loving right now.  I think these shoes make a great transition for people who love the hand-crafted effect, but have less of a HEY-LOOK-AT-ME-I-JUST-CAME-HOME-FROM-SUMMER-CAMP look.


I will say that the Ombre effect of the black pair is somewhat lost in this photo, but that's what I get for using my old cell phone.  Since these pics are about a year old, I can't exactly re-take the photos, but trust me when I say this was a fun and easy craft, and possibly the most useful thing I've ever crafted.  I flat wore these out!

To start, all you need is a couple of pairs of canvas sneakers (I picked mine up at Goodwill for $1/pair), some dye (I like the liquid Rit dye because it's so easy to manipulate the "strength" of the color, and because it comes in real colors people wear, not just lime green and hot pink).  You may also choose to use a "dipping container" rather than just filling a sink or bucket.  It allows you to waste a LOT less of the dye.  I used empty bottles out of the recycle bin.

 Step 1:  Remove laces and anything else you don't want colored.  I left the insoles in, but you could snatch those out if you don't want them to have the ombre effect.  I will say that I wore dark socks for about the first week I wore them just in case, but I never noticed any dye bleeding.
Step 2: Fill your dip stations.  I kept a little of the undiluted purple aside to do my laces dark.  It was just the look I was going for.  I left the other pair white.  Since the rubber and eyelets don't change from white, you may want to leave the laces white.  It's up to you!

Step 3: Dip!  There are many different techniques, and since my hands were full, I don't have pictures.  Don't freak out about dye getting in the wrong places because either it won't show, like on the insides/bottoms of the shoe, or it won't matter, like on the rubber and eyelets, where it won't stick. There is a lot of individual style and technique involved (just like in tie-dye), but I'll share some of my faves:
  • Ombre: submerge your shoe completely under the dye and sing your favorite nursery rhyme, then pull it out a couple of inches and repeat the process until your entire shoe is dyed.  Depending on the strength of your dye and the material of your shoe, you may want to time about two minutes between raises.  Go shorter times rather than longer, because if you pull a shoe out and it's not the desired shade/darkness, you can just dip it in and repeat the process.  It will get a bit darker each time.
  • Alternative: Try doing this technique but start with it only dipped half-way up the shoe.  Flip the shoe over an repeat for the same amount of time.  Your outcome would be a dark-light-dark effect... very cool!
  • Dip-dye: I did the "ombre technique: with purple dye, then briefly dipped the toe and heel in the black for a multi-color look.  
  • Alternative: For a brighter, more colorful look, you could dip one end 2/3 down with yellow and from the other end, 2/3 with blue and you would get a yellow-green-blue shoe!
Step 4: Let it dry overnight.  I put mine out in the garage, but at the time I was living in Eugene, OR, where it's rainy and cool and things DO NOT dry overnight.  If you live somewhere balmy, throw them out back on a sunny afternoon.  Once they're dry (or have been wet for at least 12 hours)  toss 'em in your washing machine and follow the directions on your dye packet for rinsing/washing.  That's it!

This (and the pic at the top) is as close as I have to a good "after" shot.  I promise I will get better at taking pics, and I can't apologize enough for the quality.  Please give it a shot because these pics don't do it justice. I would love to see some of your creations (and photography skills)!

Thanks for sticking with me through this post, I'm a little rusty, but it's great to be back.  I would love to hear what you think.  I'm going to be posting crafty, foodie, and who-knows-what-else in the near future, so stop back by.  Feel free to "follow" so you can keep up with all my adventures.  If you enjoyed the tutorial, please share!

[Linked up to:  Make It Wear It Thursday Transformation Thursday Under $100 Linky Party

Somewhat Simple
Photobucket
It's a Party Hookin' up with HOH ]

Thursday, January 19, 2012

No Cash Trash Bash: Beautiful Boozy Bookend


I'm a little pleased with myself right now, so please bear with me.  It cost me $0 to make this craft.  Absolutely freeeee is my favorite craft budget!  I have been stashing all the materials to make this craft for a while, until I finally had everything together.

All you need is an empty 6-pack.  Keep the whole thing: cardboard pack and the bottles.  I say keep the bottle caps too, because you know I'm going to come up with something to do with 'em in no time.  Luckily, I live with a young man in his 20's and so these are ALWAYS stacked plentifully in the recycle bin and I can have my pick.  I highly recommend that you wash these out with dish soap and let them dry for a good long while.  I called this  a "Boozy Bookend", but let's get real; I do not want my desk or bookshelf to reek of old beer.  Gross.  To be fair, if you don't have access to beer bottles because you don't drink, you could do the same thing with Coca-Cola glass bottles in a 6-pack, but I don't live in 1954, so they're not readily available to me.  I think there are flavored sodas in glass bottle 6-packs at the grocery store, but as I said before the appeal of this craft for me was that it was FREE materials.  Deal with it.

I really don't know what came over me yesterday.  One minute I was waking up at 7a.m. to get ahead on homework (confession:  I had a post due for one of my online classes at 9a.m. and may or may not have procrastinated a touch.)  The next thing I knew, I had done a day's worth of school work in less than two hours and by 9a.m. I had three crafts going an one time!  (Look for the frame and magazine pages in upcoming posts)  I may have lost my mind for just a sec, but it worked.  I found out that my white acrylic paint is alarmingly thin, so I was able to work on other crafty projects between the million or so coats it took to achieve full-coverage. 

I use dried roses in this post.  These roses from a bouquet I received after my fall were dried for 3ish days before I placed them in these bottles.  If you don't know how to dry roses so that they keep their shape and color, comment below and I'll share that.  I've been doing it since high school, so I will just go on assuming that everyone knows how to do that.

On to the actual tutorial...
Step 1:  Wash the bottles out.  Seriously, this is non-negotiable.  Let them dry completely before painting.  Step 2: Paint the bottles with acrylic.  Thinner gloss paints will require multiple coats (the white took 5 or more for full coverage) whereas thicker flat coats were full-coverage in only a coat or two.  The purple was a flat paint, so after it dried I covered with Mod Podge to give a gloss finish and protect the paint.  Step 3: Spray paint the cardboard container.  I recommend priming with primer or acrylic paint.  ESPECIALLY on the exposed raw cardboard on the inside of the container.  It just soaks spray paint right up.
Step 4: Once everything is dry, plop them together and stick 'em on a shelf.  TaDa!!!  That wasn't so hard now, was it?


Linked up at the following parties: Crafty Soiree, Blog Stalking Thursday, Hookin' up with HOH, Show off your stuff party

Thursday, January 12, 2012

Hanging Bathroom Organizer

This post is a super quicky post.  I don't have a lot of detailed description because the instructions are so simple.  Please enjoy all the pictures, though!

I bought this block of wood at Goodwill two or three months ago.  It was half off, so I paid less than a dollar for it.  I just couldn't resist the potential of something clearly crafted with a purpose, but left half-finished.  It seemed to speak to me, but I waited until it was practically shouting before I got around to doing something with it.  It became a wonderful bathroom addition.


For starters, I purchased a can of spray on primer.  I wasn't sure exactly how or what I was going to paint it, but I figured raw wood was going to drink up whatever I put on there.  I actually primed it the week I brought it home.  It proceeded to sit politely on my shelf and wait for MONTHS to be given a purpose.  I finally figured out what I could use it for, and began my attack.  I painted it all over a lovely "Tiffany Blue" color.  I used E6000 to adhere the tops of three glass jars to the underside (to hold my bobby pins and hair ties).  I replaced the too-short rope with a piece of white-ish ribbon.  I hung it all up with a "Hercules Hook" which boasts a strength of 50lbs.  I am so pleased with how this turned out!  I love perusing the shelves of Goodwill for hidden treasures.

Saturday, December 17, 2011

Delish Breakfast in 3 Minutes

This is what you'll get to make if you make it to the bottom of the post, but first I get to talk at you!   Let the mouth watering commence.

Okay, blog pals.  I am so far behind, but I'm about to get all kinds of caught up.  Finals were nuttier than squirrel poop, but I'm past all that and I'm ready to get on a crafting binge.  I already have about 8 crafts finished and with pictures, but I need to write up the blogs in addition, I am taking on a couple of HUGE projects this week (we're talking 12 feet across, huge... if everything goes according to my plan...which it never does) so keep on the lookout for that.  And now, the big one!   So, let's kick off this craft-mania with a super speedy recipe that every single person should have on hand for breakfast in a pinch!

Now, on to the yummies...

I don't know about you, but my roommates and I are starving in the morning, but it's not worth getting up 20 minutes early to make a good breakfast.  I was inspired to try this one morning after seeing my roommate "Struggles" leave in a frenzy for the doctor.  See, she had a doctor's appointment, so she had gotten up about an hour before she had to leave.  That's plenty of time, right?  Well, she had to get ready, which doesn't take too long, but she decided to have a "good" breakfast of cinnamon rolls as well.  They were just your typical unwrap the can, put 'em in a pan kind.  You know the name brand... with the little ticklish fellow... but they take 30 MINUTES to prepare!  20 to cook, then they need to cool enough to ice (another 5) and it takes at least 7 minutes for our oven to heat up.  Needless to say, I had just come in the kitchen sniffing around for breakfast when Struggles took one bite and realized she was going to be late for the Doctor.  So she ran out the door, leaving her two sad cinnamon rolls with only one bite missing, sitting on the counter.  I was sad for Struggles.  Thus was born my greatest yummy to date!

What you need:
A waffle iron
A can of cinnamon rolls
Some non-stick spray
3-5 minutes

What you do:
Crack open the can of cinnamon rolls.  4 can fit on the iron at a time, and the rest will keep in a tupperware in the fridge (but I don't recommend leaving them for more than a week.) so only use as many as you plan to eat right that second.  Heat up the waffle iron (which takes less than a minute in my house).   Spray that hot waffle iron with the non-stick spray of your choice and plop your cinnamon rolls on the iron and close it.  Now, don't use the waffle-iron timer, just time it yourself.  Caution:  there's usually one side of the iron that gets done faster than the other.  The half on the "opening" side takes 2 1/2 minutes to cook and the closed side takes 3.  If you leave them too long, you've got yourself some burnt cinnamon rolls, which are still quite edible given enough of the icing. 

Once your rolls are done, fork them onto a plate (WATCH OUT, THOSE PUPPIES ARE HOT!) and ice 'em.  Possible the best part of this is that the waffle iron has created cups for the icing to sit in, so you don't have to worry about all of it running off the roll like it does on traditional cinnamon rolls.  They cool pretty fast, too.  I usually take a bite as soon as it's iced without burning my mouth.  So there it is:  a super yummy cinnamon roll breakfast in less than 5 minutes from the time you crack the can open.  I'm calling them "Cinn-fully Delicious Waffle Rolls"  or... "Waffled Cinnamon Rolls"  or... "Yummy in my Tummy".  What do you think I should call 'em?   Have a great Saturday!  I know what's for breakfast tomorrow!  ;)


Oh, and I read this last week in Women's Health Magazine, and thought you'd like to know... Check out this month's issue for more about it! [Sorry about the quality of the pic, I was riding the bus and snapped it on my phone.]


Shared on Calling All Crafters Monday, Inspire Me Monday, Make Something Monday, Market Yourself MondayMore The Merrier MondaysMuffin Mondays, Show It Off Mondays, Meet Me Monday, So Creative Party Time

Friday, November 11, 2011

Chalk & Awe

I'm house-sitting this weekend with the best dog and cat ON THE PLANET!  I'm serious, these guys are amazing.  You'll see them in the pics later on.  Now for the craft:

I've wanted a chalkboard forever.  There are two main purposes I'm interested in.  I have a few friends who have featured them in pictures.  I love the idea that you could write something on the chalkboard and have it appear in the photo more organically than if you were to put it in with a photo editing program later.  The other reason I wanted one is that I have wanted a cute, decorative way to feature inspirational quotes in my bedroom and a chalkboard is just the thing.  Every time I look for them in craft stores or the school-supply and craft aisles of my neighborhood big-box store, I can't handle how much they cost.  I'm looking at a minimum of $10 for a plain-jane one, then I have to decorate the raw wood edge.  ...it would take all weekend.  Blah.  So, while wandering Walmart, disappointed that they hadn't magically gone down to 5 cents overnight, I had an epiphany!  It went something like this:
 
 Even better, I had a few hours to spare between Chem Lab and work, so I got a head start on it, since I knew I would need time to dry.

So here we go!

Things you need:
  • $2 picture frame.  (Mine is actually a "document frame" because it was so much cheaper, just make sure it has the glass, because that becomes the chalkboard.)  Go ahead and get an ugly one, because it won't matter later.
  • Spray paint
  • CHALKBOARD SPRAY PAINT!!!! (How have I not realized how much I needed this before?)
What you do:
Take the frame apart.  Discard the family photo or pretend document that came in the frame but mean nothing to you.  Unless you really like it... then save it for another craft.  Make sure you save the back so that you can put it all back together at the end!
Spray the glass (one side only) with 3 smooth, even coats (not too thick) of chalkboard paint.  Let it completely dry between coats.  (Mine took about an hour to completely dry because it was really cold outside.)  Alternate spray direction between coats, so one is applied in landscape passes and the next in portrait.  Does that make sense?  I hope it does, because I can't really think of another way to describe it.  Once your 3rd coat is dry, set the glass aside in a safe place.  The paint needs to cure for 24 hours before we can chalk it up. 

While you wait for the chalk paint to set up, go ahead and spray paint that ugly frame a cute color that will accent your room well (or one that just jumps out at you)!  I went with the accent color on my comforter (which happens to be the color of my sheets).  Mine was made of some sort of cheap plastic material which STRONGLY resisted being spray painted.  With several persistent, super-thin coats I was finally able to achieve the color I was going for.  It honestly took 6-8 coats before I was getting full coverage. (this pic is before)

Side Note:  I strongly recommend getting a great cardboard box from the produce department of your local grocery.  They are great for catching all the crazy spray dust from spray paint.  Also, they have handles, so you can spray outside and move it inside to dry after the smell has dissipated some and you don't have to put fingerprints in it.  Magical.

After your 24 hours of settling is done, you have to "prime" the chalkboard by rubbing the side of a piece of chalk all over the board.  It would be more stable if you put it back in the frame first, but I like a good struggle, so I did it before I put it back together.   Once you erase the chalk, put the frame back together and get to chalkin'!  If you're house-sitting, make your new furry friends pose with your creation!    I have a feeling you'll be seeing this board again...  What would you do with your very own chalkboard?

Thursday, November 10, 2011

Pump Up Your Cup...cake, that is.

If you could taste what I'm tasting right now, you would be a happy, happy panda. These are seriously yumeroo.

I came across this on a blog somewhere last week and now I can't find it (even though I could have SWORN I saved it in my favorites), so I sort of had to wing the details. Luckily, it's so simple, there was little opportunity for disaster. I still made a pretty good sized mess. So here it is: A pumpkin cuppy recipe.

Ingredients: (get ready, the list is long)
  • yellow cake mix (1 box)
  • pumpkin goo (1 15oz can)
Procedure:
Pour the goo in a bowl.  Add the mix.  Pour into cupcake pan.  Bake at 350ish for 20ish min. Tada.
30 minutes after you crack open the can of goo, you should be chowing on pumpkin delight.

I know you're saying to yourself "WOAAAAAH!  Slow down!  That was intense!"

Since I can pretty much guarantee that you're going to try and complicate matters, allow me to elaborate on what is not required:
-Do not add the eggs, oil, or whatever else they tell you to on the box.  Unnecessary.
-Do not buy pumpkin crap.  You want pumpkin goo.  The ingredients list should look like this: "Pumpkin."
-If you want to use cupcake paper, you'll have cupcakes.  If not, they look like little cornbread muffins.  I did half with, half without.  Powdered sugar is nice on top. (Warning:  it's super messy and presents a choking hazard if you're trying to take a big whif before biting in.)
-Would this be delicious with spice cake or other mix?  OF COURSE IT WOULD!  I just wanted in and out of the grocery as quick as you please, so I nabbed the plain-ole yellow and bolted.

These muffin/cupcake things are seriously delish.  The best part is that you can lick the bowl risk-free (no raw eggs)!  I am so pleased with myself that I see this becoming a regular feature in my kitchen AND you family members will be seeing this number at Christmas.  Prepare your tastebuds now!


Linked up on: Muffin Monday,