StumbleUpon Button

Showing posts with label recipe. Show all posts

Wednesday, March 13, 2013

100% Real Fruit Roll-Ups

I confess, I have an addiction.  I have eliminated ingredients I can't pronounce from my diet as much as I can on a very tight budget.  I don't claim have the perfect diet, but I do what I can.  My addiction:  fruit roll-ups.  I'm not kidding you, I could sit down and eat a whole box at any given moment.  Do you know what are in fruit roll-ups?  ME NEITHER!  I am also trying to get more fruit and vegetables into my daily diet.  My one stone for these two birds?  100% real fruit roll-ups.

Are you excited?  You should be!  Here's the tutorial:

Step 1:  Start with fruit.  You can use any kind of fruit you want.  Berries, grapes, bananas, apples, seriously, go nuts.  I used blackberries and bananas, with a little grape juice squeezed in.  I should tell you, my measurements are not precise... I am a cooking snacker.  It's true.  So here's what I did, but keep in mind, it is almost impossible to mess this up.  So I used about 1 1/2 mason jars of blackberries and about 1 1/2 large bananas that were very ripe.  I used 1 1/2 because I ate the other half while I was peeling them!  Hahaha, I am really enjoying this post so far.  (Are my perfectionist readers angry yet?)  Put your fruit in a mediumish saucepan on the stove, low heat.  I also squeezed a handful of grapes' juice over the fruit.

Step 2:  Mash and mix.  As the fruit warms, get out your favorite masher and mash!

 Once you have everything thoroughly mashed together it will look something like this.  I am sure if you are more dedicated to hand-mashing than I am, you could mash to a smooth puree by hand.  I do not have that many hours in the day, so once I got it to a rough mash,  I whipped out the ol' hand mixer.  Keep in mind, the hand mixer is going to be messy.  VERY, EXTREMELY MESSY!  I don't know if I'm just terrible at being clean, but I had berry goo all over my hand, shirt, mixer, and stove top.  I am a messy cooker, but this was nuts.  sheesh!  I started at the lowest speed, went to medium for a while, then whipped it up to high for just a few seconds.  Again, these things are not an exact science, I was just winging it until my puree looked like this:

(Since I used Blackberries, mine are quite seedy.  I don't mind the seeds.  If you do, choose a less seedy berry, like blueberries, or other fruit.) 

Step 3:  Slap it on a pan!  Lay some parchment paper over a cookie sheet and spray it with non-stick spray. Do not skip this step.  Trust me.  It lifts off so easy when sprayed.  Use the back of a spoon or spatula to spread the mix evenly.  My pot of fruit made about 2 cups of puree, which was the perfect amount for my large cookie sheet.  Spread evenly, so as to avoid thin spots which will become crunchy rather than chewy and roll-up-y.

Step 4:  Pop it in the oven.  Set your oven to the lowest temperature.  I have the oldest, ugliest, crappiest electric oven on the PLANET.  My lowest temp setting is 200*, but there's also this ambiguous "warm" temp... I went somewhere between 200 and warm.  Between 150* and 175* is ideal.  Leave your oven open just a little.  Again, my oven is the worst, so it will only hold itself closed, halfway open, or completely open... ARGGGG!  ...so anyway, I stuck a wooden spoon in the door to keep it open just a crack.  You have to let some of the moisture out.  The cooking process will take about 5 hours... It can take more or less than that depending on what fruit you use.  You have to keep an eye on it starting at around 4 hours.  When you're done, the roll-ups will be a nice, dark color.  Poke it as you go.  It should feel slightly squishy but not sticky when it's done.  
If it stops feeling squishy, and is crunchy, you've gone too far or spread too thin.  I'm not 100* sure, but I bet if you squeezed some fresh juice over it (think grape or apple) and let it set (covered) for a while, you could probably moisten it back up some.

I am not perfect, so I always have a few crunchy spots.  I tear them apart from the nice chewy bits and put them in a baggy to crumble over oatmeal or yogurt later.

When your roll-ups are finished cooking, pull the parchment paper to a cutting mat and use a pizza roller to slice into rolls.  All that's left is to roll 'em up and enjoy!  I would love to hear about the fruit combos you choose to try!
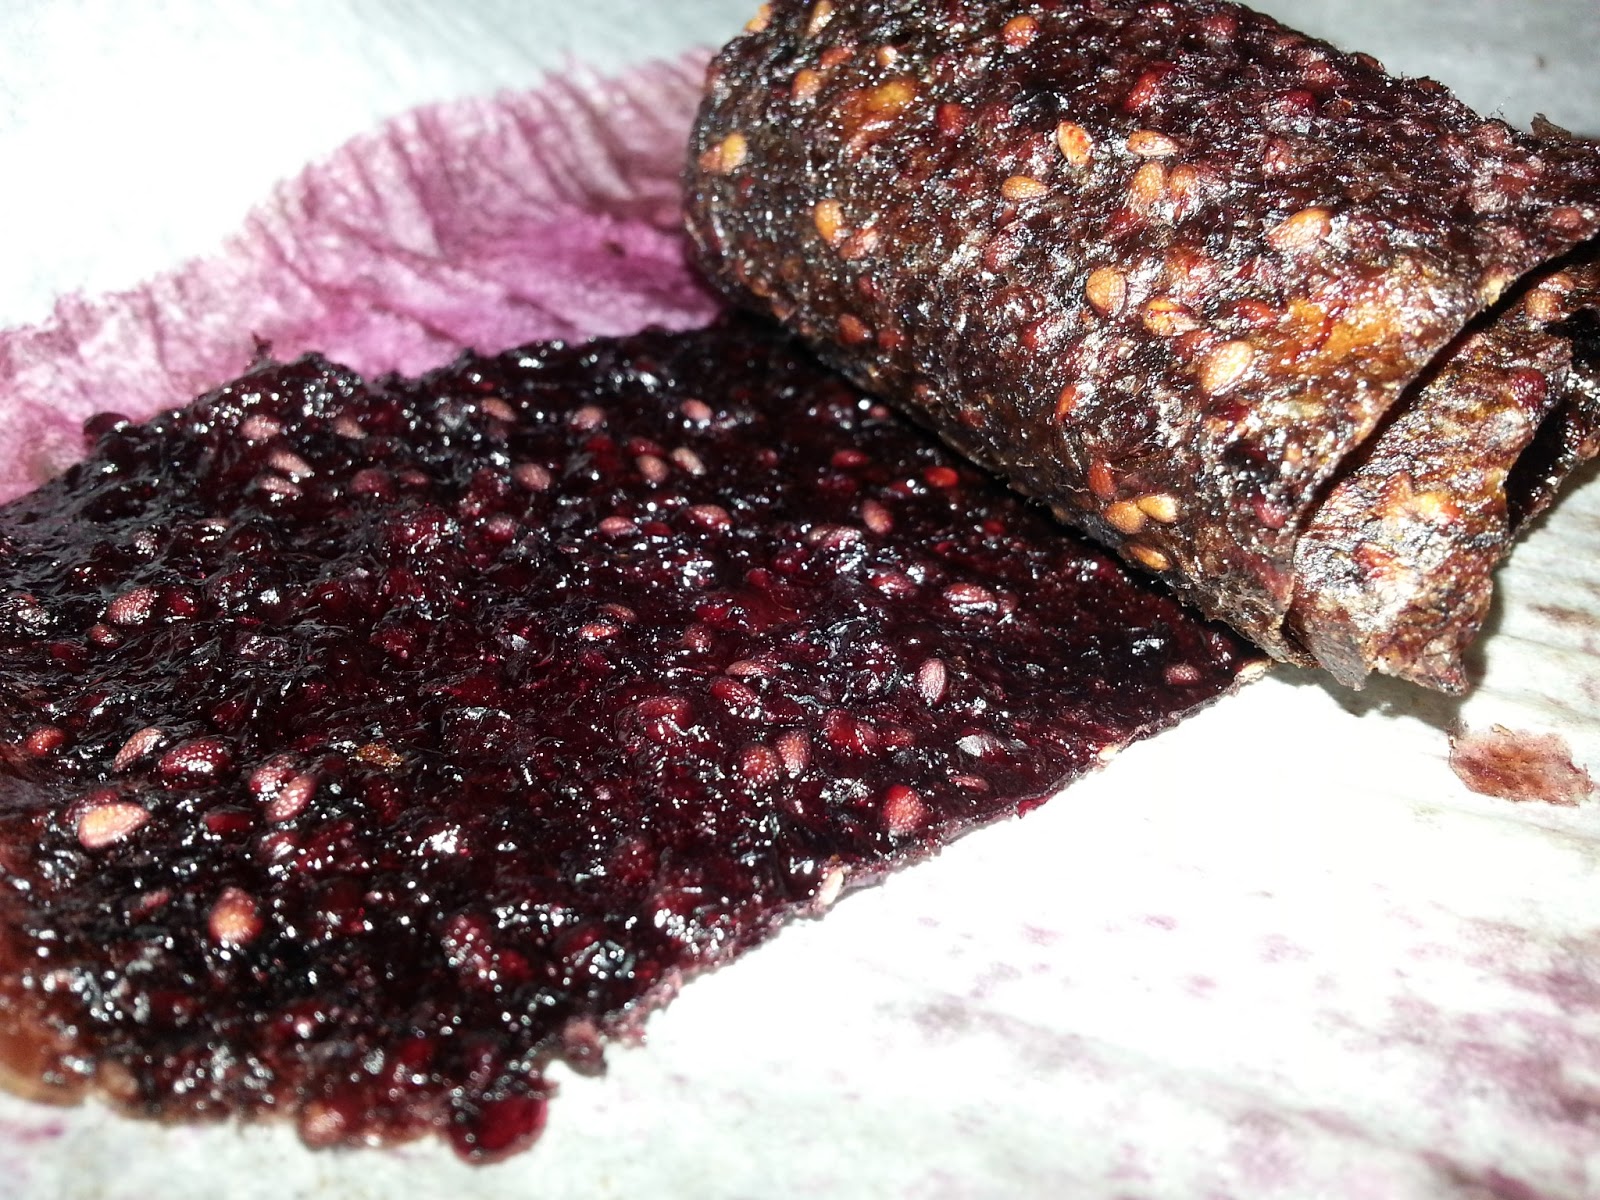

So, what do you think?  The pictures were a little better, huh?  In other news, I GOT ENGAGED THIS WEEKEND!!!!  I'm so happy, and since my wedding will (obviously) be almost completely hand-made DIY projects, you can expect plenty of pretty new projects coming your way.  I am one happy gal!

[Linked up at:  , Under $100 Linky Party ]

Saturday, December 17, 2011

Delish Breakfast in 3 Minutes

This is what you'll get to make if you make it to the bottom of the post, but first I get to talk at you!   Let the mouth watering commence.

Okay, blog pals.  I am so far behind, but I'm about to get all kinds of caught up.  Finals were nuttier than squirrel poop, but I'm past all that and I'm ready to get on a crafting binge.  I already have about 8 crafts finished and with pictures, but I need to write up the blogs in addition, I am taking on a couple of HUGE projects this week (we're talking 12 feet across, huge... if everything goes according to my plan...which it never does) so keep on the lookout for that.  And now, the big one!   So, let's kick off this craft-mania with a super speedy recipe that every single person should have on hand for breakfast in a pinch!

Now, on to the yummies...

I don't know about you, but my roommates and I are starving in the morning, but it's not worth getting up 20 minutes early to make a good breakfast.  I was inspired to try this one morning after seeing my roommate "Struggles" leave in a frenzy for the doctor.  See, she had a doctor's appointment, so she had gotten up about an hour before she had to leave.  That's plenty of time, right?  Well, she had to get ready, which doesn't take too long, but she decided to have a "good" breakfast of cinnamon rolls as well.  They were just your typical unwrap the can, put 'em in a pan kind.  You know the name brand... with the little ticklish fellow... but they take 30 MINUTES to prepare!  20 to cook, then they need to cool enough to ice (another 5) and it takes at least 7 minutes for our oven to heat up.  Needless to say, I had just come in the kitchen sniffing around for breakfast when Struggles took one bite and realized she was going to be late for the Doctor.  So she ran out the door, leaving her two sad cinnamon rolls with only one bite missing, sitting on the counter.  I was sad for Struggles.  Thus was born my greatest yummy to date!

What you need:
A waffle iron
A can of cinnamon rolls
Some non-stick spray
3-5 minutes

What you do:
Crack open the can of cinnamon rolls.  4 can fit on the iron at a time, and the rest will keep in a tupperware in the fridge (but I don't recommend leaving them for more than a week.) so only use as many as you plan to eat right that second.  Heat up the waffle iron (which takes less than a minute in my house).   Spray that hot waffle iron with the non-stick spray of your choice and plop your cinnamon rolls on the iron and close it.  Now, don't use the waffle-iron timer, just time it yourself.  Caution:  there's usually one side of the iron that gets done faster than the other.  The half on the "opening" side takes 2 1/2 minutes to cook and the closed side takes 3.  If you leave them too long, you've got yourself some burnt cinnamon rolls, which are still quite edible given enough of the icing. 

Once your rolls are done, fork them onto a plate (WATCH OUT, THOSE PUPPIES ARE HOT!) and ice 'em.  Possible the best part of this is that the waffle iron has created cups for the icing to sit in, so you don't have to worry about all of it running off the roll like it does on traditional cinnamon rolls.  They cool pretty fast, too.  I usually take a bite as soon as it's iced without burning my mouth.  So there it is:  a super yummy cinnamon roll breakfast in less than 5 minutes from the time you crack the can open.  I'm calling them "Cinn-fully Delicious Waffle Rolls"  or... "Waffled Cinnamon Rolls"  or... "Yummy in my Tummy".  What do you think I should call 'em?   Have a great Saturday!  I know what's for breakfast tomorrow!  ;)


Oh, and I read this last week in Women's Health Magazine, and thought you'd like to know... Check out this month's issue for more about it! [Sorry about the quality of the pic, I was riding the bus and snapped it on my phone.]


Shared on Calling All Crafters Monday, Inspire Me Monday, Make Something Monday, Market Yourself Monday,  More The Merrier Mondays,  Muffin Mondays, Show It Off Mondays, Meet Me Monday, So Creative Party Time

Thursday, November 10, 2011

Pump Up Your Cup...cake, that is.

If you could taste what I'm tasting right now, you would be a happy, happy panda. These are seriously yumeroo.

I came across this on a blog somewhere last week and now I can't find it (even though I could have SWORN I saved it in my favorites), so I sort of had to wing the details. Luckily, it's so simple, there was little opportunity for disaster. I still made a pretty good sized mess. So here it is: A pumpkin cuppy recipe.

Ingredients: (get ready, the list is long)
  • yellow cake mix (1 box)
  • pumpkin goo (1 15oz can)
Procedure:
Pour the goo in a bowl.  Add the mix.  Pour into cupcake pan.  Bake at 350ish for 20ish min. Tada.
30 minutes after you crack open the can of goo, you should be chowing on pumpkin delight.

I know you're saying to yourself "WOAAAAAH!  Slow down!  That was intense!"

Since I can pretty much guarantee that you're going to try and complicate matters, allow me to elaborate on what is not required:
-Do not add the eggs, oil, or whatever else they tell you to on the box.  Unnecessary.
-Do not buy pumpkin crap.  You want pumpkin goo.  The ingredients list should look like this: "Pumpkin."
-If you want to use cupcake paper, you'll have cupcakes.  If not, they look like little cornbread muffins.  I did half with, half without.  Powdered sugar is nice on top. (Warning:  it's super messy and presents a choking hazard if you're trying to take a big whif before biting in.)
-Would this be delicious with spice cake or other mix?  OF COURSE IT WOULD!  I just wanted in and out of the grocery as quick as you please, so I nabbed the plain-ole yellow and bolted.

These muffin/cupcake things are seriously delish.  The best part is that you can lick the bowl risk-free (no raw eggs)!  I am so pleased with myself that I see this becoming a regular feature in my kitchen AND you family members will be seeing this number at Christmas.  Prepare your tastebuds now!


Linked up on: Muffin Monday,